How to use Power Automate in Flowable
For using Power Automate with Flowable you need a Power Automate Premium account as well as a Flowable Power Automate license. In case you do not have either of those licenses, you cannot complete the setup and this guide.
This example explains how to create a Power Automate RPA bot for Flowable. Please follow this how-to for the setup the Power Automate infrastructure. Once the setup is done, you can follow this guide for creating a Power Automate bot. The bot will fill in some information into an Excel document and then read other videos from the document.
Creating the Power Automate Robot
Open the Power Automate application, login with your user credentials in case still required. Select the same environment as the environment you used for the registration with Flowable.
After the login, you can press the 'New flow' button at the top left.

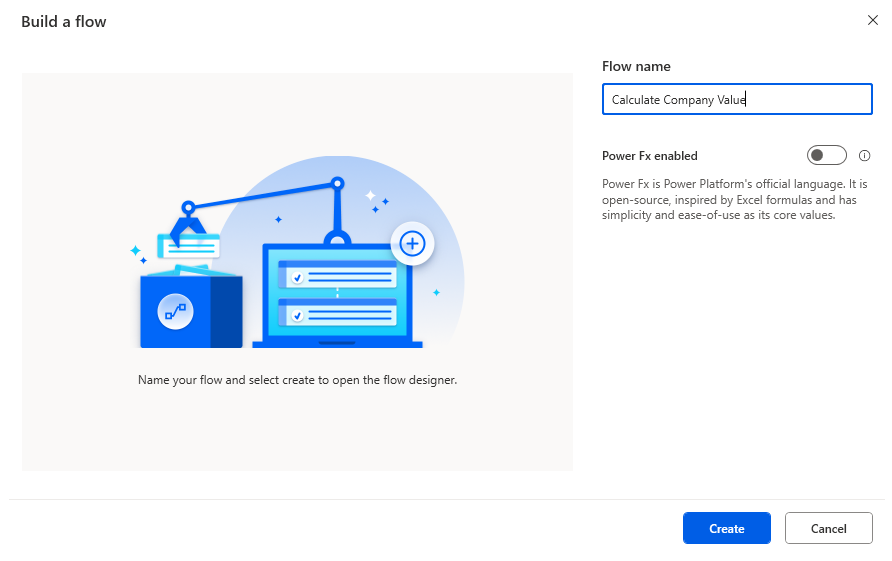
Give the flow a name, for example 'Calculate Company Value' and press 'Create':
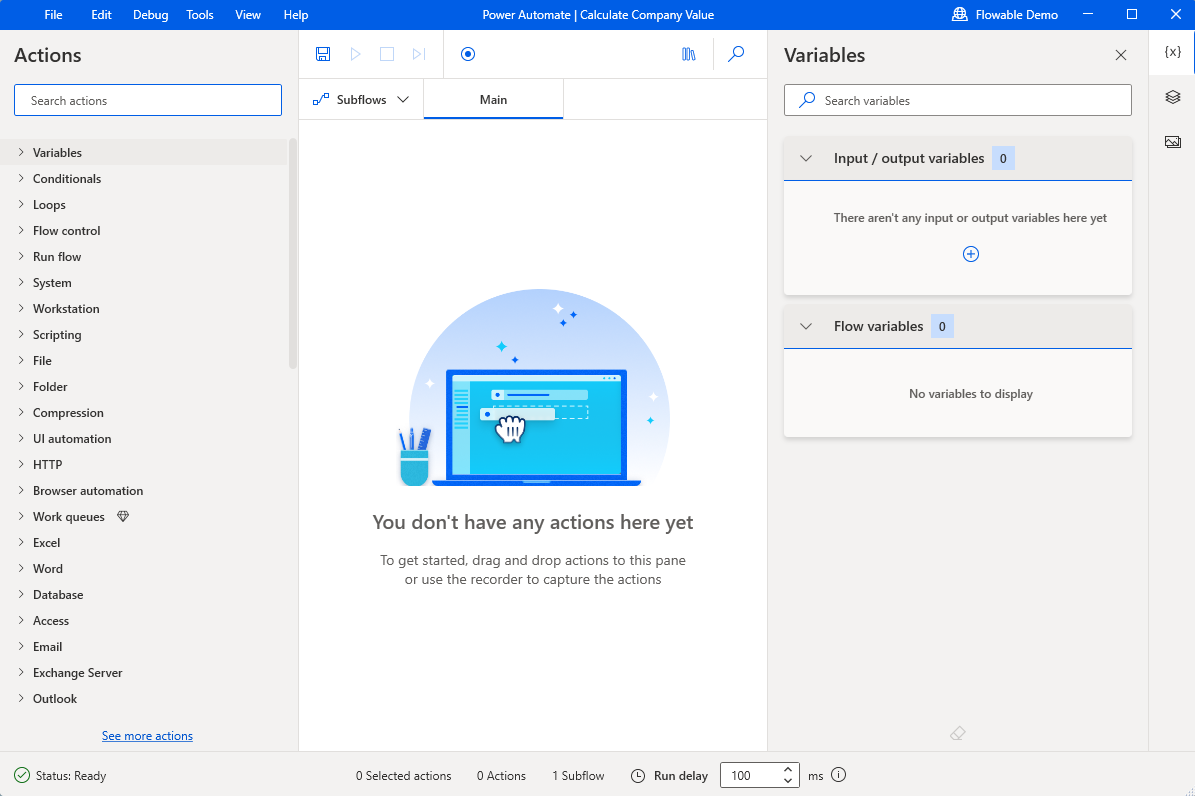
Once the create button is pressed, the flow bill be created and a new window will open:
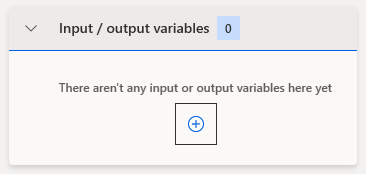
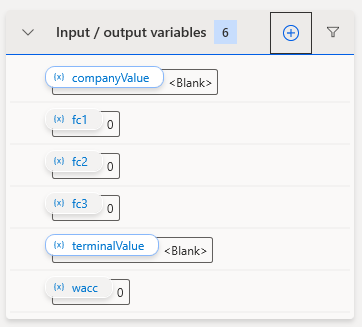
Create the following input variables on the right hand side:
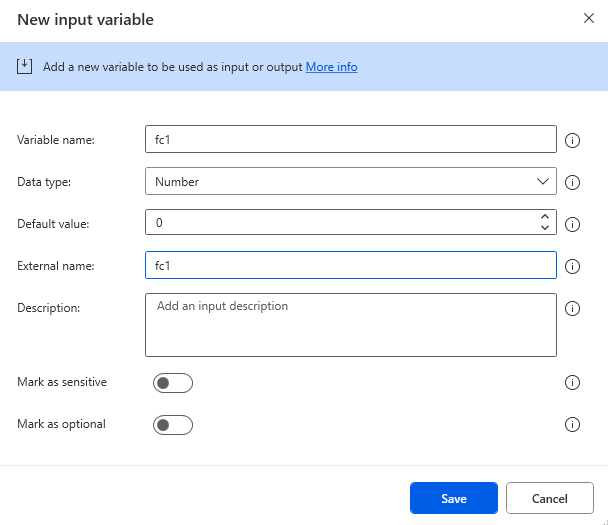
fc1, number, default value 0fc2, number, default value 0fc3, number, default value 0wacc, number, default value 0
An example on how the variable dialog will look like:
And the following output variables:
companyValue, numberterminalValue, number
With that the list of variables look like the following:
Next the following Power Automate script can be copy and pasted into the Power Automate workflow window, which will then create the steps:
Excel.LaunchExcel.LaunchAndOpenUnderExistingProcess Path: $'''C:\\Users\\flowable\\example-company-value-calculation.xlsx''' Visible: True ReadOnly: False Instance=> ExcelInstance
Excel.WriteToExcel.WriteCell Instance: ExcelInstance Value: fc1 Column: $'''B''' Row: 3
Excel.WriteToExcel.WriteCell Instance: ExcelInstance Value: fc2 Column: $'''B''' Row: 4
Excel.WriteToExcel.WriteCell Instance: ExcelInstance Value: fc3 Column: $'''B''' Row: 5
Excel.WriteToExcel.WriteCell Instance: ExcelInstance Value: wacc Column: $'''B''' Row: 6
Excel.ReadFromExcel.ReadCell Instance: ExcelInstance StartColumn: $'''B''' StartRow: 7 ReadAsText: False CellValue=> terminalValue
Excel.ReadFromExcel.ReadCell Instance: ExcelInstance StartColumn: $'''B''' StartRow: 16 ReadAsText: False CellValue=> companyValue
WAIT 4
Excel.CloseExcel.Close Instance: ExcelInstance
Once pasted, the complete Power Automate workflow looks like this:

Next, the example document referenced in the first step can be downloaded here. The path in the first step need to be adapted that it points to the downloaded file.
Don't forget to press the save button. Once this is done, the Power Automate Desktop flow is ready to use. The next step is to configure the permissions.
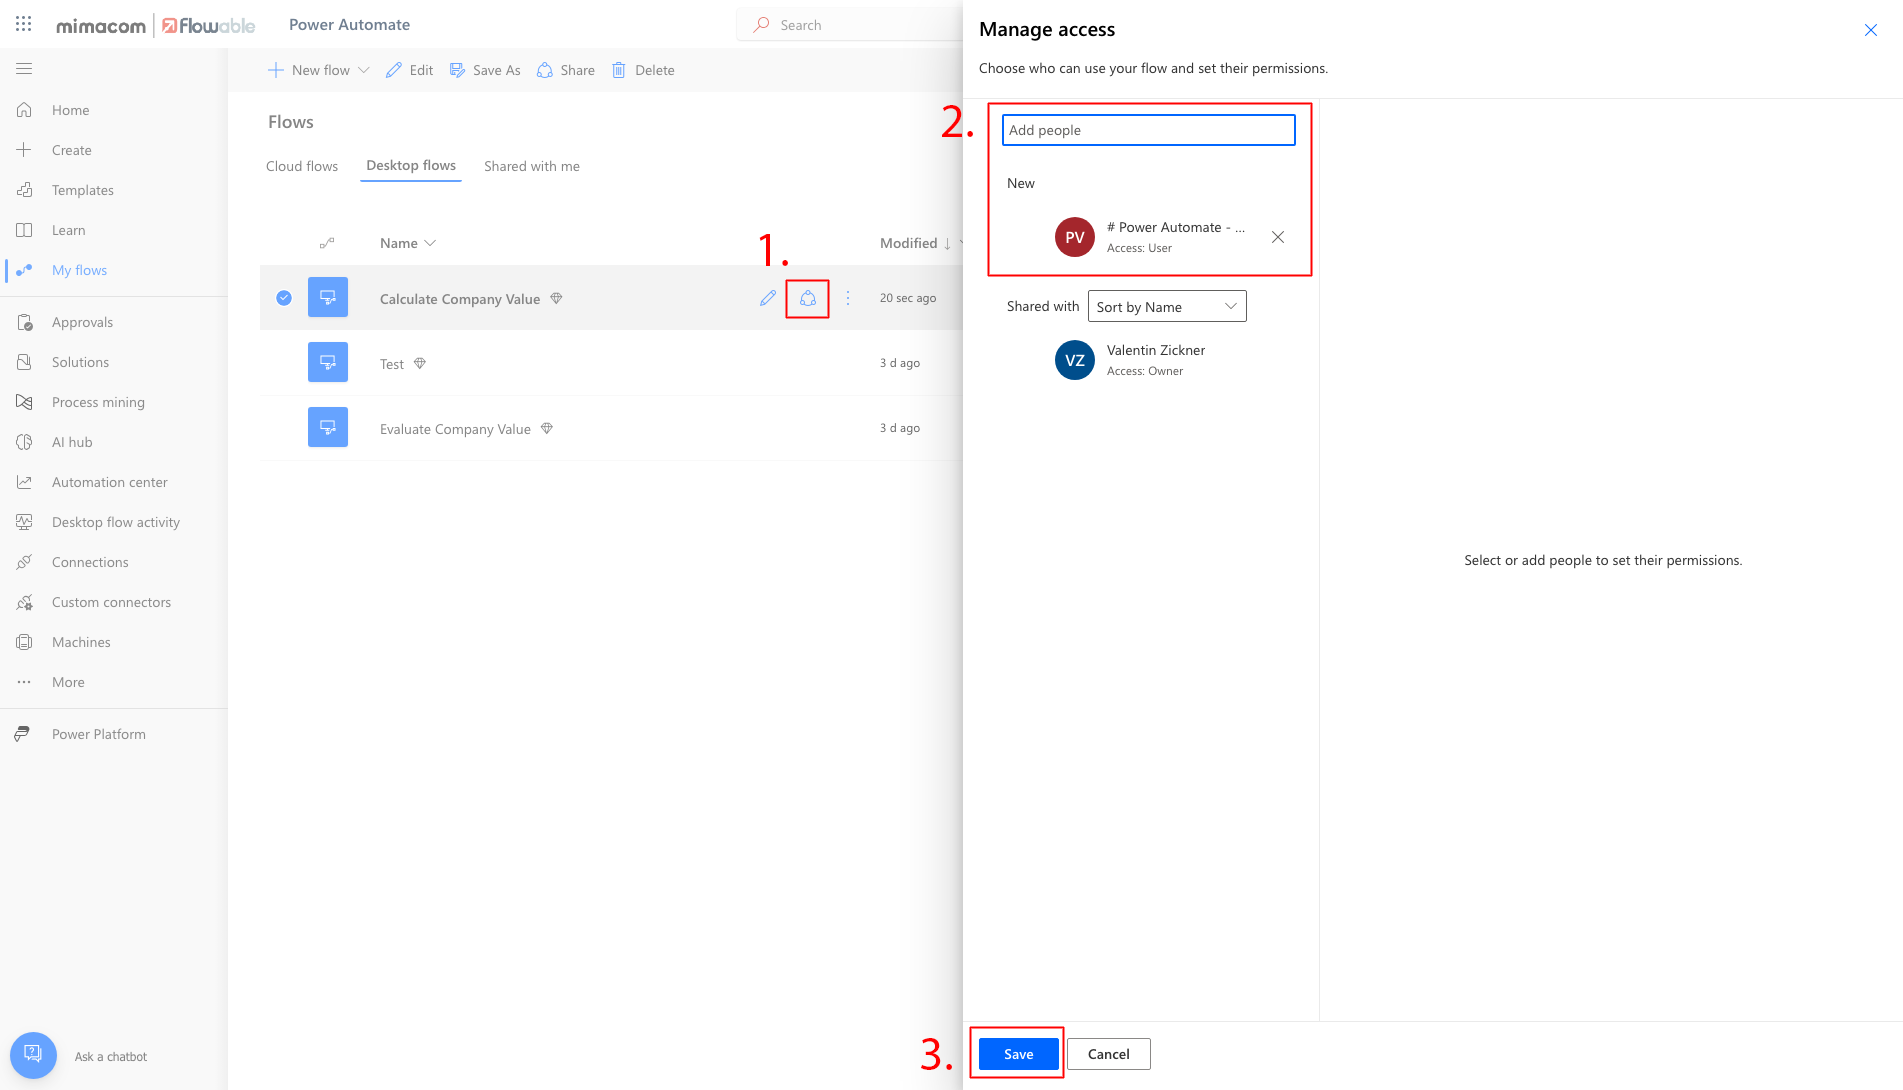
Granting Permissions to Flowable
Once the Power Automate Desktop flow is created, the user used by Flowable needs access to it. This step can be skipped, when Flowable is using an admin user with access to all flows.
Go to make.powerautomate.com and select the correct environment. Then click on the left hand menu on 'My flows' and select 'Desktop flows'.
Press the share button, add your power automate user and confirm it with the save button:
Creating the Process
Now the next step is to create the process.
A really simple process can be used to start with, which is capturing the FC1, FC2, FC3 and WACC in the start form.
Those can be parsed then down to the Power Automate task.
The result of the Power Automate task will be the companyValue and the terminalValue.
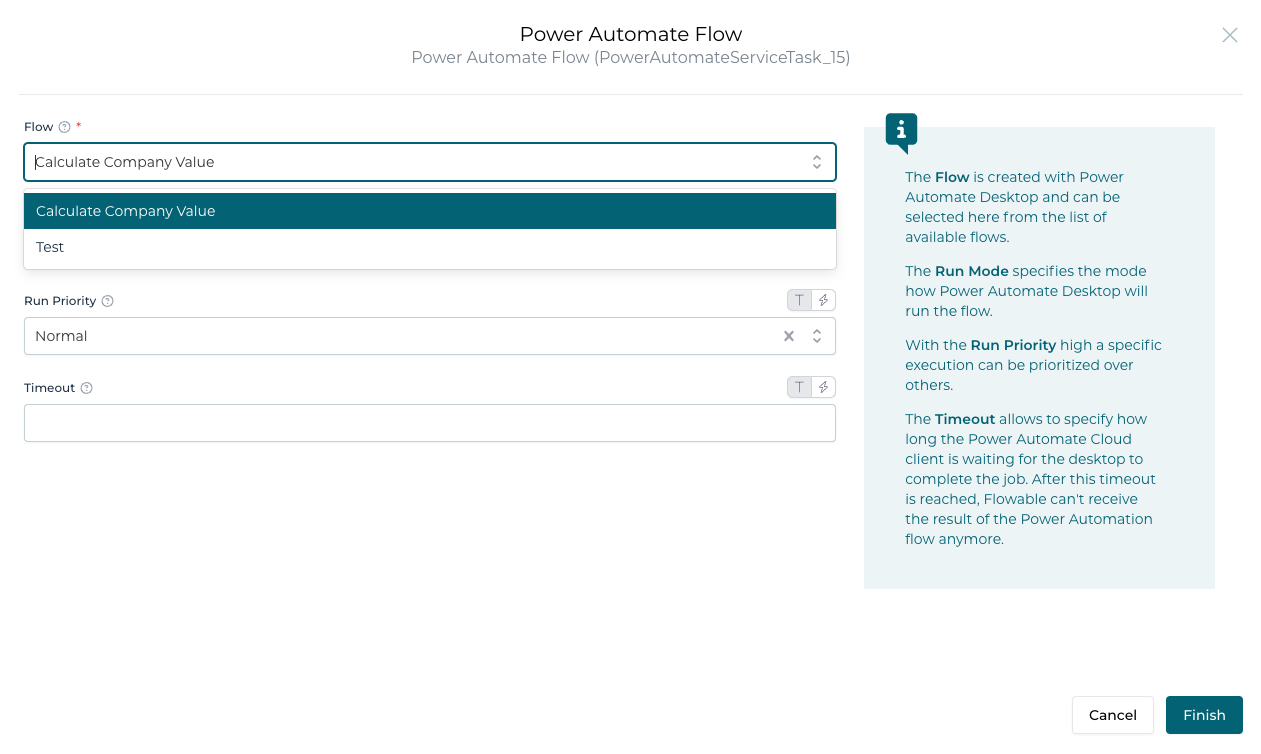
The workflow as well as the parameters for the input and output can be selected from a dropdown, which makes it easy to do the correct mapping:
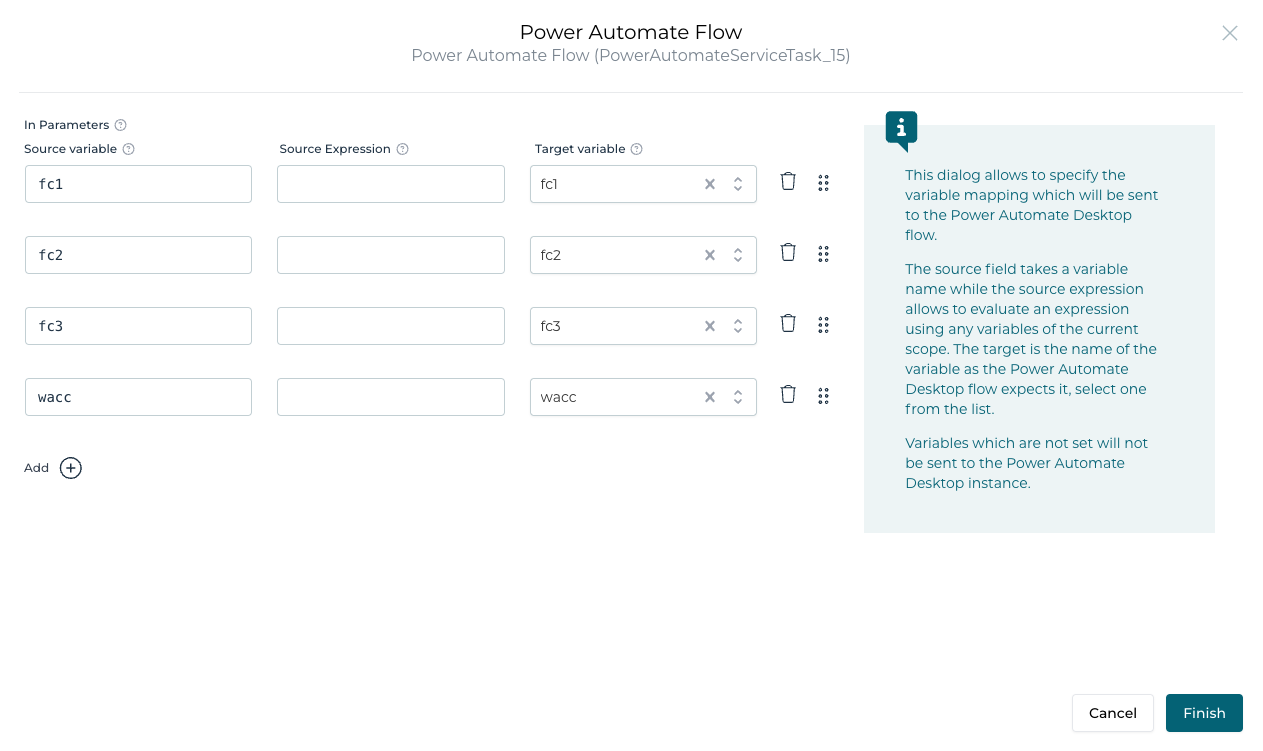
And for the input parameter the mapping would be:
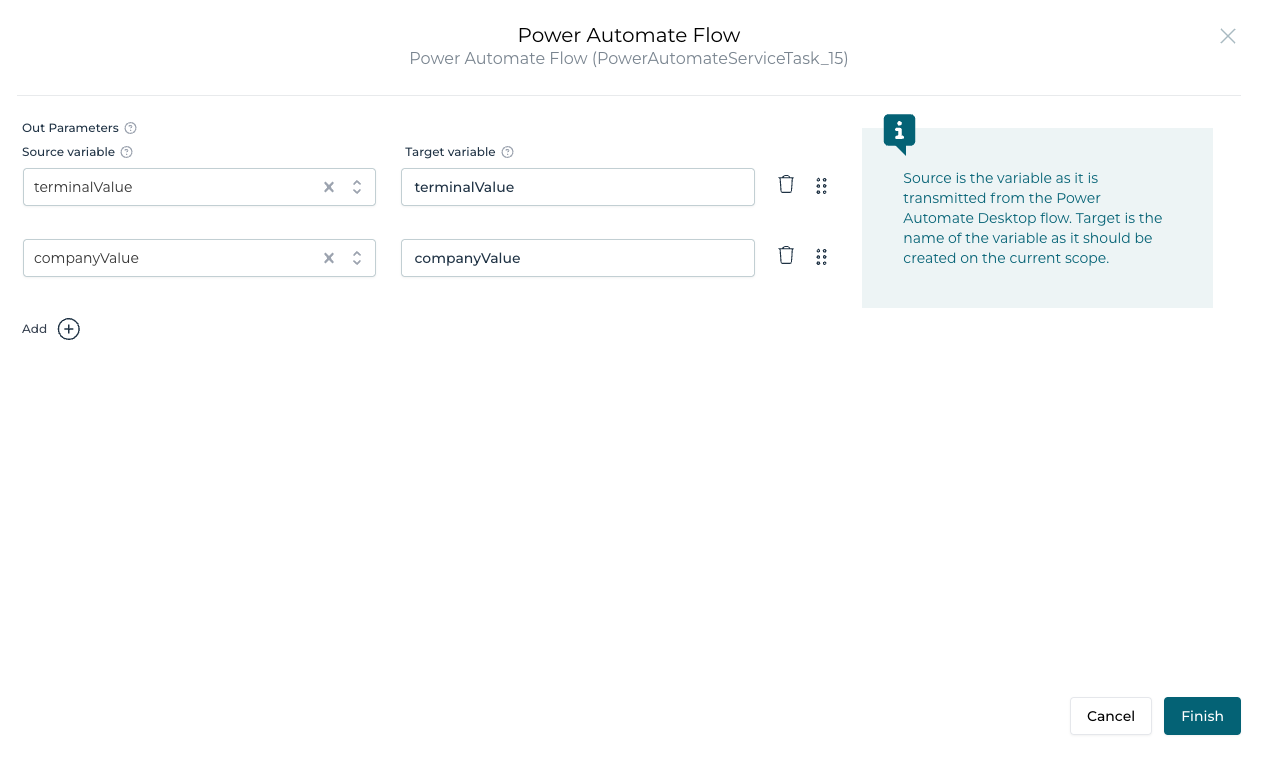
As well as the output parameters:
The process might look like this:
Conclusion
This example demonstrates the seamless integration of an RPA bot with Flowable BPMN processes, leveraging Power Automate Desktop. By following the steps, you created a Power Automate Desktop bot interacting with application interfaces like Excel, and integrated the bot into a Flowable process to handle input and output parameters.
Through this approach, the power of RPA can enhance your BPMN workflows, automating tedious tasks like data extraction and entry. This makes processes more efficient, while the flexibility of Power Automate Desktop ensures adaptability to various use cases.