Connect to Power Automate Desktop
For using Power Automate with Flowable you need a Power Automate Premium account as well as a Flowable Power Automate license. In case you do not have either of those licenses, you cannot complete the setup and this guide.
To connect Flowable with Power Automate Desktop the following steps must be completed:
Getting Power Automate ready to be used
First step is to get Power Automate ready to execute desktop flows through the Power Automate Cloud. Once the Cloud setup is connected, Power Automate Desktop is also connected to the Microsoft Dataverse which is used to trigger Power Automate Desktop flows from Flowable.
Setup a Power Automate Desktop environment
To setup a Power Automate Desktop environment Power Automate Desktop need to be installed. During the installation, ensure that also the machine-runtime application is installed, since this is later used to register the machine in the Power Automation Cloud.
The following how-to from Microsoft can be used to create the machine registration.
Creation of a machine group in the Power Automate Cloud
Power Automate Desktop flows from Flowable are executed on one or multiple machines, which are dedicated to execute the RPA flows. Those machines must be managed in so-called machine groups. The next step, once the machine is registered, a machine group must be created and at least one machine assigned.
Follow this tutorial to create the machine group and assign your machine to it.
Creating a service account for Power Automate
Once Power Automate Desktop is ready, a Service Account can be created. There are again multiple steps involved to get the service account ready.
Create an Azure Active directory app
The first thing we need to do before starting with the Flowable Project setup is to make sure that we have an Azure Active Directory instance. If you don't have one then we suggest following the Create Azure Active Directory instance guide from Azure.
However, most likely you have one Azure Active Directory for your company. We will head to https://portal.azure.com/ and navigate to it. Next step is going to be to create our Application Registrations. The steps for that are explained here in the Azure documentation. Make sure that you store the generated key somewhere, we will need it for configuring our application.
You can skip the last three steps (adding a platform), because we are going to use it as a service token.
Creating an app user
Once we have the client registration, we can use that client registration to create a new app user. This is done in the Power Automate admin center and the following step-by-step guide can be used.
Once the user is created, the user also needs to be granted permissions to use Power Automate. The following set of conditions is required:
- Basic User
- Cxp Dataverse Datasource Services User
- Environment Maker
Optionally, also the permission System Administrator can be granted, to give the service account access to all the available workflows without any registration.
Sharing the machine group with the service account
Once the service account is created, we still need to connect it with the Power Automate machine group. This tutorial can be used to share, select as a user the service account created before.
Creating a connection for the machine group with the service account
Since the machine group is now accessible by the service account, it is also possible to create a machine connection.
This can be only done by the REST API and the token from the service principle need to be used for this.
Follow this tutorial for creating the machine connection and use an ID of your choice.
The following is a sample request to create the connection:
{
  "properties": {
    "environment": {
      "id": "/providers/Microsoft.PowerApps/environments/{{environmentId}}",
      "name": "{{environmentId}}"
    },
    "connectionParametersSet": {
      "name": "azureRelay",
      "values": {
        "username": {
          "value": "{{username}}"
        },
        "password": {
          "value": "{{password}}"
        },
        "targetId": {
          "value": "{{machineGroupId}}"
        }
      }
    }
  }
}
The {{username}} and {{password}} are the local credentials of the machine, while the targetId needs to be the ID of the machine group.
This ID ({{machineGroupId}}) is visible in the URL when browsing the machine group in Power Automate:
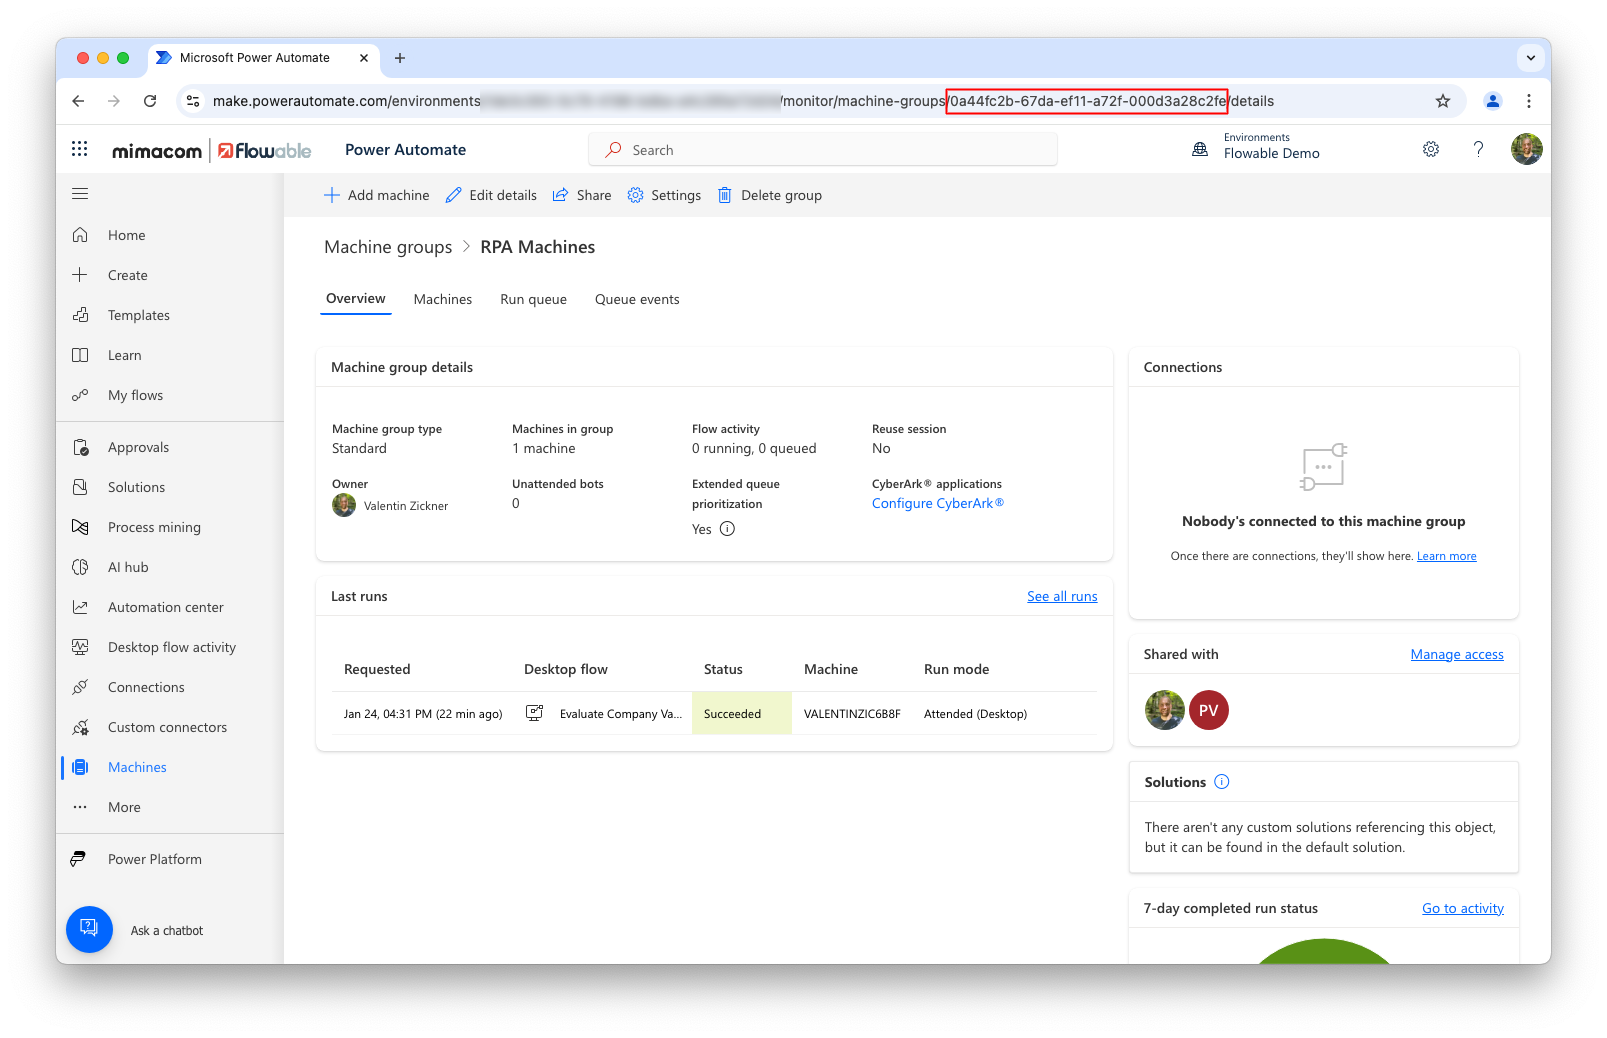
The response code looks similar to this:
{
	"name": "6b05abae-5e79-4fde-9c62-964aa57a0125",
	"id": "/providers/Microsoft.PowerApps/apis/shared_uiflow/connections/6b05abae-5e79-4fde-9c62-964aa57a0125",
	"type": "Microsoft.PowerApps/apis/connections",
	"properties": {
		"apiId": "/providers/Microsoft.PowerApps/apis/shared_uiflow",
		"displayName": "valentin (RPA Machines)",
        ...
        "connectionParametersSet": {
			"name": "azureRelay",
			"values": {
				....
				"xrmInstanceUri": {
					"value": "https://orgXXXXXXXX.crmX.dynamics.com/"
				},
				....
			}
		},
		...
	}
}
From this response, save the name (in the example above 6b05abae-5e79-4fde-9c62-964aa57a0125) and the xrmInstanceUri in the example above https://orgXXXXXXXX.crmX.dynamics.com/.
Both are needed for the Flowable configuration
Configuring Flowable
There is a full list of all Power Automate properties for Flowable Work in the work properties section.
Those are the most relevant properties:
# Enable Power Automate integration
flowable.power-automate.registration-id=power-automate
flowable.power-automate.api-base-url=https://orgXXXXXXXX.crmX.dynamics.com
#flowable.power-automate.poll-job-retries=10
#flowable.power-automate.poll-job-initial-retry-timeout=20s
flowable.power-automate.default-connection-name=

spring.security.oauth2.client.registration.power-automate.client-id=
spring.security.oauth2.client.registration.power-automate.client-secret=
spring.security.oauth2.client.registration.power-automate.scope=${flowable.power-automate.api-base-url}/.default
spring.security.oauth2.client.registration.power-automate.authorization-grant-type=client_credentials
spring.security.oauth2.client.provider.power-automate.token-uri=https://login.microsoftonline.com/{tenant-id}/oauth2/v2.0/token
The following properties need to be replaced:
- API Base URL: The URL from the service account connection response.
- Default Connection Name: The name of the connection from the service account connection response.
- Client ID/Client Secret: The credentials from the client created in the Azure Active directory app.
- Tenant ID: With the tenant id of the Microsoft tenant.
Conclusion
Once the steps are completed, Flowable Design will connect to Flowable Work to fetch the available flows. In case no admin credentials are provided, the flows need to be shared with the service account user to make them visible. Flows can be then executed as part of a BPMN process or a CMMN case. An example on how-to use Power Automate can be found in the following guide.